Six lessons learned from a Garmin panel makeover
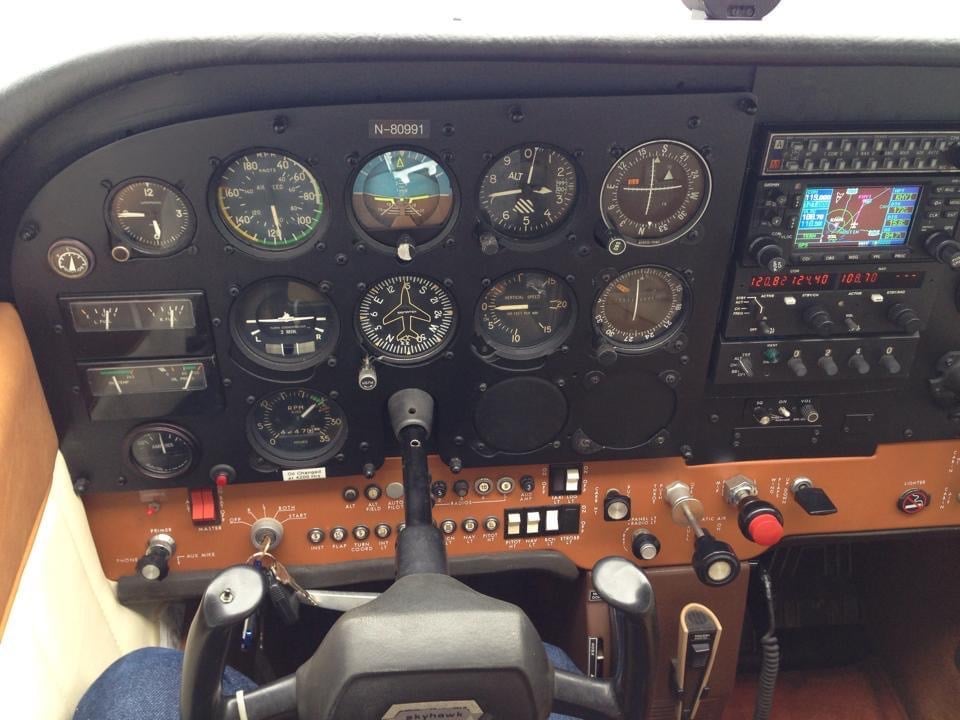
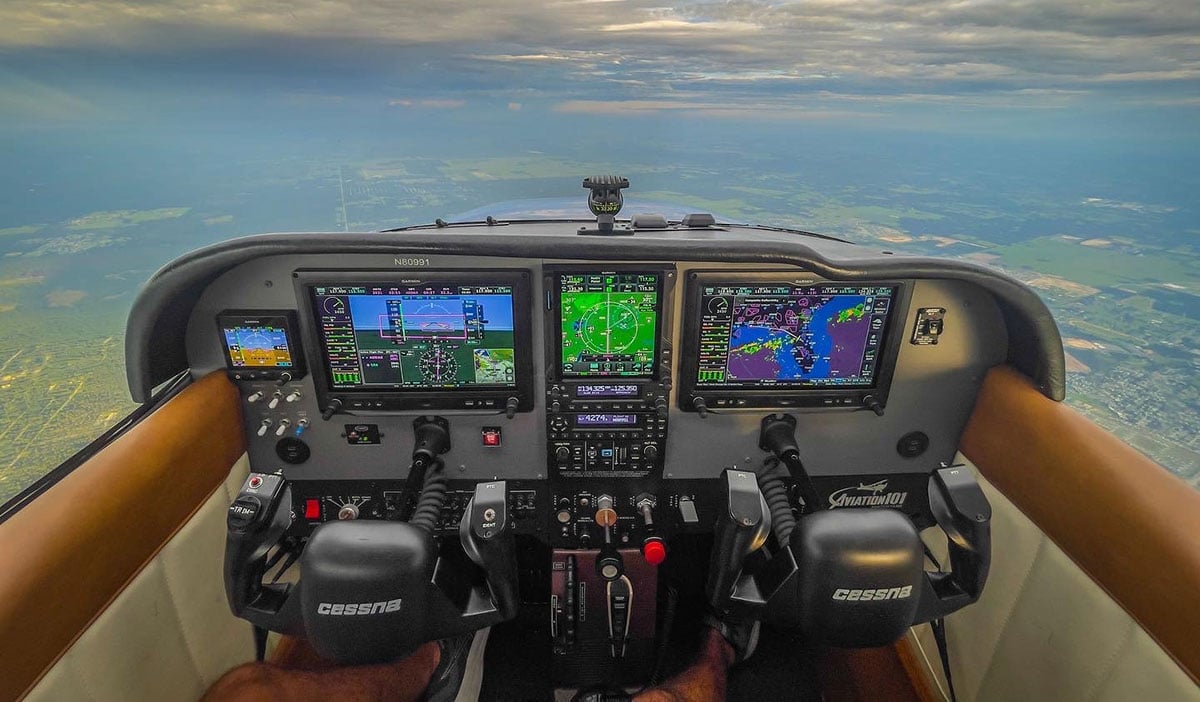
Josh Flowers and his father bought N80991, a 1976 Cessna 172 Skyhawk, more than 9 years ago. Since then, that aircraft has become the centerpiece for the online aviation videos he posts as @Aviation101Films that share the passion and craft of flight. When it came time to redo the interior, it made sense that the Garmin ambassador would give the airplane a full Garmin panel.
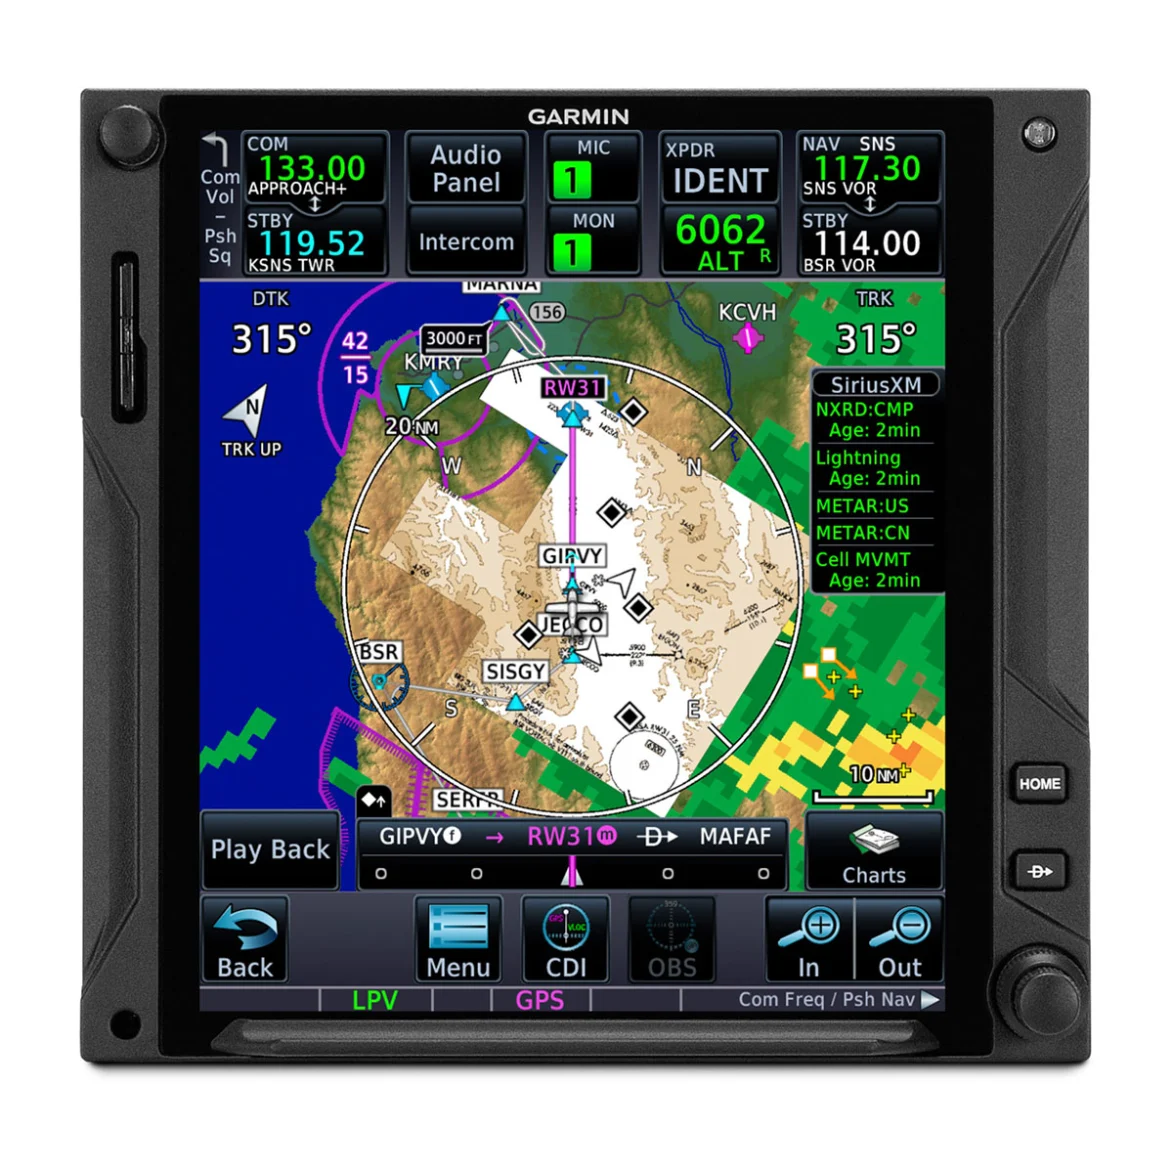
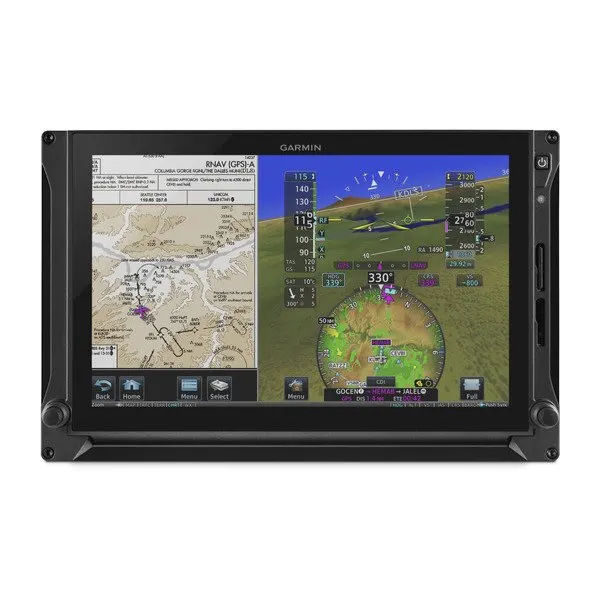
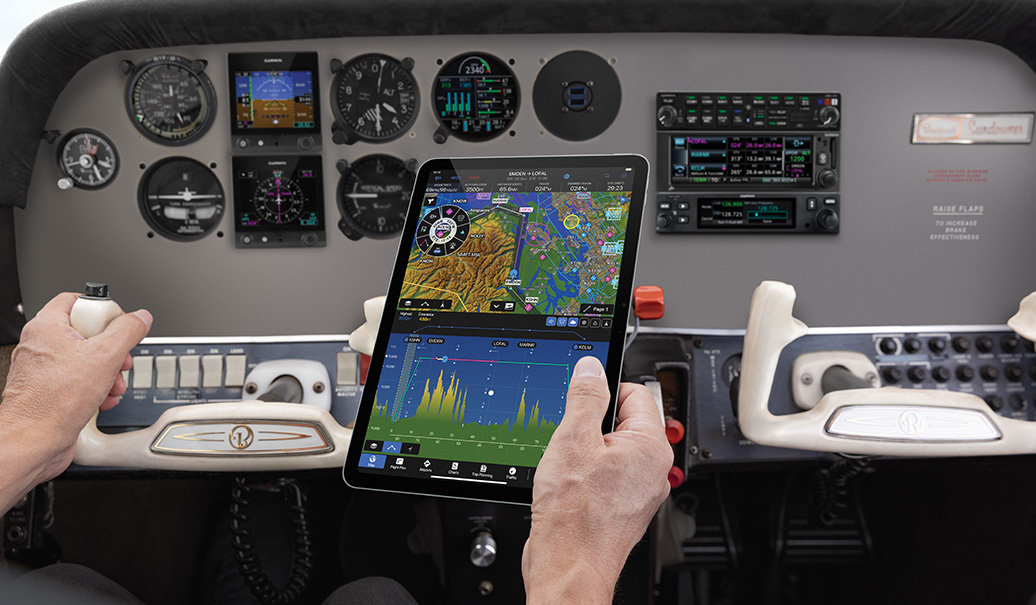
But adding the new avionics — including dual G3X Touch™ flight displays, a GTN™ 750Xi navigator, a backup G5 display, a remote Garmin audio panel, GNC® 255 radio, GTX™ 345 transponder, GFC™ 500 two-axis autopilot with auto trim and more — required a full redo of the panel. It was an exhaustive process. It’s no wonder, then, that he has some valuable lessons to share that can help you navigate a panel upgrade of your own.
1. Pick a shop you trust.
You’ll spend a lot of quality time with them, and they’ll spend many man-hours inside your airplane. Plus, you’ll be flying behind their work, sometimes in IMC conditions. Professionalism, attention to detail and meticulous work are key.
“Seeing an airplane that you’re so familiar with be gutted down to the aft side of the firewall gave me an overwhelming feeling of ‘what have we done?’” Josh says. “I knew good and well the experts at Daytona Aircraft Services were going to take their time to do this project right, and this airplane was going to be far better and safer than it was on the trip out there.”
2. Gut it if you can.
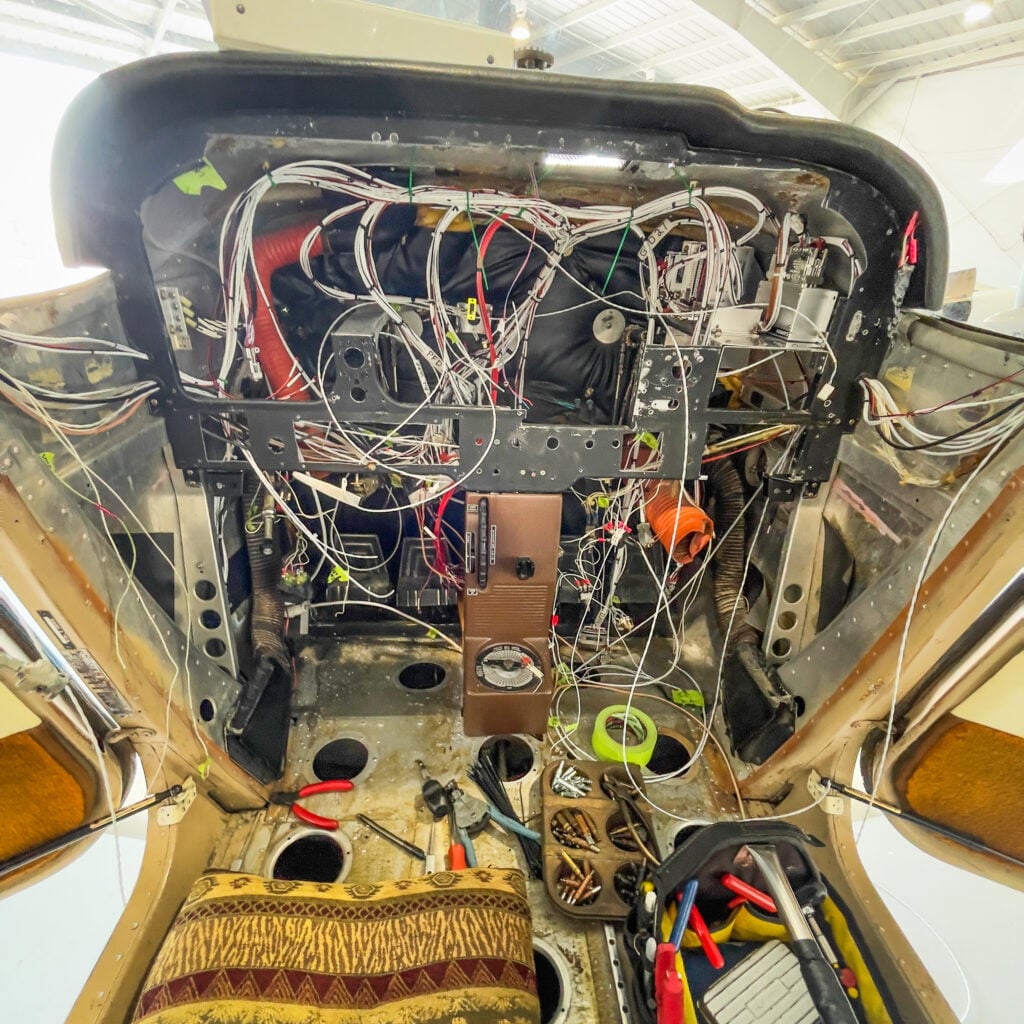
The shop crew started disassembly by tracing every wire — what it’s from and where it goes. They removed wiring from previous upgrades that didn’t need to be there anymore, then freshly rewired the whole airplane. That was a mind-blowing experience, Josh says, seeing how much stuff can be wrong or unsafe in an airplane that pilots don’t even really know about — and don’t even notice. “I think that’s why it’s so important that, if you’re going to do a major retrofit like this, you’ve got to gut it,” Josh says. “You’ve got to pull everything out and just redo everything.”
3. Measure twice, cut once.
Creating a custom panel is part art, part technical skill, and the shop used a multistep process to get everything to fit properly. They started with a generic CAD drawing of the panel for his model Skyhawk, cut a panel out of clear plastic on a CNC router for a trial fit, tweaked the drawing where changes were needed and made new versions.
“They basically keep cutting new plastic pieces as many times as they need until the design is laid out and fits everything in the airplane perfectly,” Josh says. “Then they’ll cut their final panel out of 0.090 aluminum using that final CAD design.”
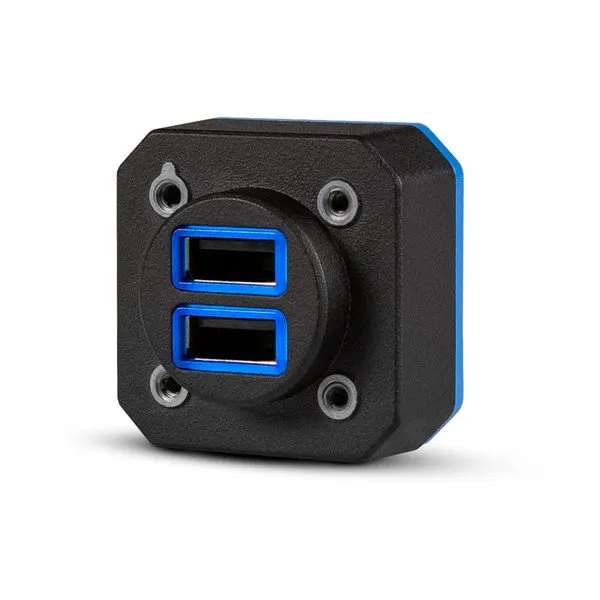
Ultimately, they moved switches to more logical places and added a Garmin GSB™ 15 USB port, Garmin Smart Glide™ switch, a CO detector and 406 MHz ELT remote switch. They also refabricated mounting rails to position the G3X Touch displays over the yokes and center the avionics stack so they could install the new equipment securely. The goal wasn’t just to make the panel attractive, but also to make it strong and stout. “I am mind-blown by this shop’s attention to detail,” Josh says.
4. It takes time to test everything.
While the panel may look finished once everything is installed, there’s still a lot left to do. The shop went through every single setting and configured systems for the airplane as laid out by the Garmin Supplemental Type Certificate. That includes such minutia as autopilot servo torques and gains, checking CAN bus communication to ensure the networked avionics talk among each other and complete troubleshooting. “This takes a long, long time, and it’s very tedious,” Josh says.
At the end of the installation, a new weight-and-balance calculation indicated the aircraft gained 60 pounds over its logbook weight. Josh attributes that to imprecise record-keeping over the life of the airplane. That could have serious implications when it’s flown near gross weight, so it’s critical insight as he flies the aircraft into its second life.
5. Learn the new equipment.
The airplane had dual G5 flight instruments, so Josh was familiar with flying behind an EFIS. But while the full panel added awesome new cross-country capabilities, it also injected new levels of integration and greater complexity into Josh’s flying. Before he ever flew his upgraded airplane, he smoothed the avionics learning curve by training in Daytona Aircraft Services’ RV-7, which has an almost identical panel.
“I’m finding that letting the autopilot completely do the approach for you, it’s like another skill set to maintain situational awareness when you’re not the one actively flying the airplane,” Josh says. “I’ve been familiarized with all these avionics. But I have some proficiency to catch up on with this entirely new panel.”
6. Make sure everything works before you depart.
Once the retrofit was complete and he was up to speed, he flew several flight-test missions with shop pilots to ensure everything worked properly. That attention to detail is an important final step. “They want to get things right the first time instead of rushing through it, and the customer having to bring the airplane back to them with an electrical or mechanical issue,” Josh says.
Now that he has the airplane back, he’s excited by how gorgeous — and now how safe — his airplane has been put together. It’s practically a different airplane, and he’s ready for the aviation adventures it’ll make possible.
“This autopilot, the dual G3X Touch, the GTN 750Xi, I think all of this is going to be a game-changer for me — it’s going to make me enjoy cross countries more,” Josh says. “I’m super excited about all of this.”