How to use a backup camera correctly
In 2018 the U.S. government enacted federal regulation that required all new vehicles to be made with rearview cameras. Crashes from people backing up, advocates pointed out at the time, killed more than 200 people annually and injured more than 12,000. Recent statistics from KidsandCars.org state that at least 50 children are backed over in the U.S. each week, with 12-23 months being the average victim age. “Frontovers” (which are the opposite of backovers) are a risk to this age group as well because small children don’t understand the concept of blind zones.
Mounting a camera to your vehicle can be crucial for adding visibility and awareness. But just having a backup camera only takes you so far — you also have to know how to use it properly.
Whether outfitting your older car, getting used to the one your newer ride came with or upgrading to a newer, sharper Garmin backup camera, follow the tips below to maximize the additional safety and convenience a backup camera brings to your vehicle.
Make sure you follow the installation instructions for your specific model.
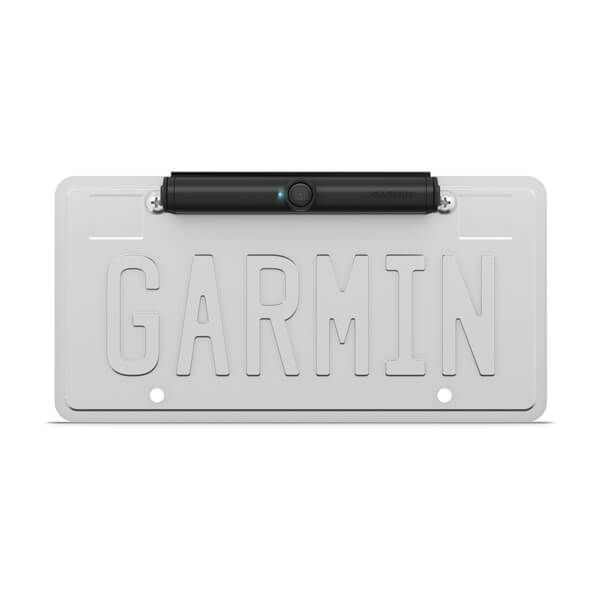
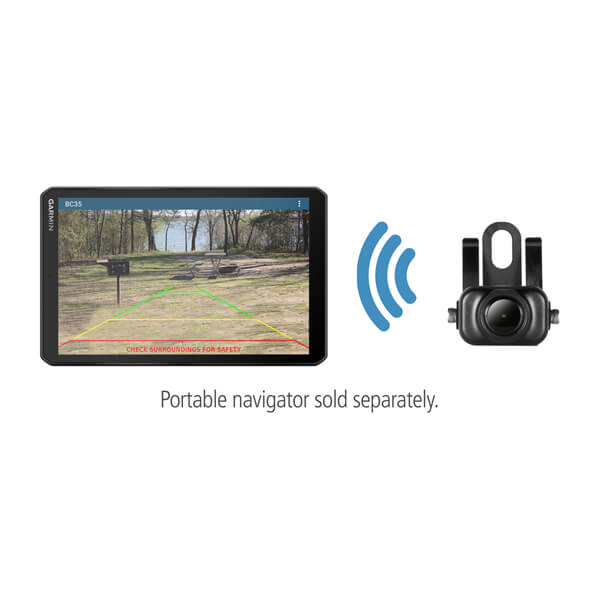
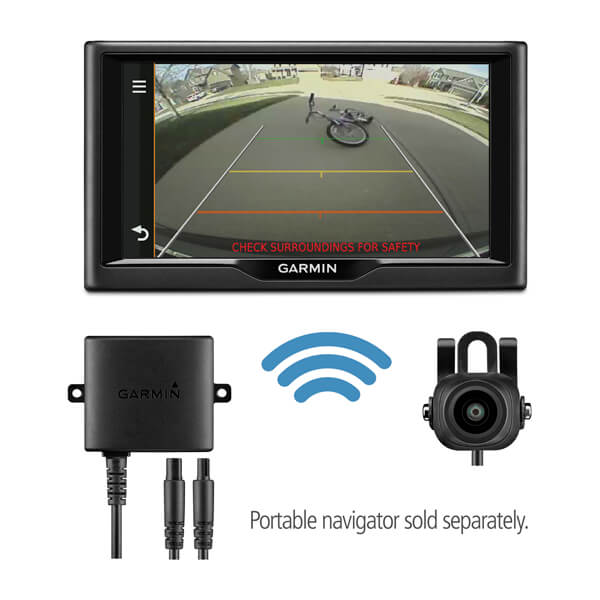
For some models, like the Garmin BC™ 40, it’s as easy as snapping your camera into the included license plate mount. For others, like the Garmin™ BC 30 or the Garmin™ BC 35, it’s recommended that a professional handle the install by connecting your camera to a power source such as the rear lights.
Remember that a backup camera is an added safety feature, not a replacement for using your eyes.
Before backing up, always make sure that you’ve walked behind your car to check for objects behind the vehicle. Even the best backup cameras can still miss objects lying on the ground or underneath your bumper. When you get into your car, check over your shoulders and in your side and rearview mirrors before putting your car into reverse. Then, as you back up, continue to monitor your surroundings, your side mirrors and your camera image.
Know how to read between the lines.
Most backup cameras utilize stoplight-colored lines on the display. (Be sure to check your preferences for the guidance lines in your device settings before use.) The view you see on the display will typically be about the width of your car — at Garmin, we like a 160° wide-angle field of view. The lines on the screen will indicate what will be in your path if you continue to press the gas. If an object like a parked car is in the green view, you’ve got a ways to go before you hit it. Once it moves into yellow, you’re running out of room, and if it moves into red, you’ve just about hit your limit. Of course, this is assuming that you are backing out of a crowded lot or attempting to parallel park — if a person, animal or moving vehicle is anywhere in your backup camera view, you should stop immediately.
Get the right backup camera for your lifestyle.
Not all backup cameras are created equally. You’ll want to ensure that yours is rugged enough to withstand the elements (remember that it will be living on the outside of your car), can transmit data far enough to be reliable in the driver’s seat and can pair with your navigator to avoid too many screens on the dash. Working with a longer vehicle or pulling an RV or trailer? You may want to consider a Garmin wireless backup camera extension cable for extending your camera range. Powersports enthusiasts have options as well, like the Garmin BC 40 with tube mount, which allows for the easy addition of a wireless camera to a four-wheeler or side-by-side.
Ready to upgrade your backup experience? View Garmin’s range of backup cameras here.